Filming UGC videos with natural light at any time of day
Learn how to read window light, golden hour, and open shade to film flattering, consistent UGC videos without buying a single piece of lighting gear.

I've watched creators drop $200 on a ring light, set it up three feet from their face, and produce footage that looks exactly like a deer in headlights. Flat. Harsh. Weirdly clinical. Then I've seen creators film on a $300 phone next to a north-facing window and produce footage that makes brands ask, "who shot this?"
The difference isn't the gear. It's understanding light.
Filming UGC videos with natural light is genuinely one of the highest-leverage skills you can build as a creator — and almost nobody teaches it properly. Most guides either say "shoot near a window" (useless) or tell you to buy a $400 LED panel (defeats the point). This is the practical version: what to do at 7am, at noon, at 4pm, and every tricky situation in between.
Why natural light makes your UGC footage look better
Brands aren't buying Hollywood production. They're buying footage that looks like a real person filmed it because they loved the product — not because someone lit a set. Natural light gives you that texture for free.
Here's what artificial lighting almost always gets wrong: it's single-source, which means one direction, one color temperature, and a falloff that trained eyes can immediately read as "studio." Natural light bounces off walls, ceilings, and outdoor surfaces to create wrap-around illumination. That wrap is what makes skin tones look human instead of washed out.
There's also a consistency argument. A ring light requires setup. Natural light is already there when you grab your phone to shoot a spontaneous reaction or product moment. For creators who batch content — which you should be doing if you're serious about this — understanding your apartment's natural light patterns means you can schedule shoots by time of day instead of lugging equipment around.
If you're building out your filming fundamentals, the how to film UGC content that converts (full guide) covers the full picture. This post goes deep on one specific piece of it: using what the sun already gives you.
How to read your space before you ever hit record
Before you film anything, do a 10-minute audit of your space at the time you plan to shoot. This takes one afternoon and saves you from bad footage for months.
Find your north-facing windows first. In the northern hemisphere, north-facing windows never get direct sunlight — the light is indirect all day. That means it's consistently soft, cool-toned, and flattering without any setup. If you have a north-facing window in your home, that's your primary filming spot. Period.
South-facing windows are the opposite problem. They get direct sunlight for hours in the middle of the day. Shoot there too early or too late and the light is gorgeous. Shoot at noon and you've got a spotlight burning half your face.
East and west are time-dependent. East is beautiful in the morning — soft, directional, warm. By 10am it's already shifting. West lights up beautifully in the afternoon and goes golden around 2 hours before sunset.
The other thing to check: what's outside the window? A white wall or light pavement outside bounces extra light in and acts like a free reflector. Trees or dark buildings absorb light and will give you a cooler, dimmer setup.
Once you know your windows, you know your schedule.
Quick audit drill: Set a timer for the next three days and photograph the same spot in your home at 8am, noon, and 4pm. You'll instantly see which window, which time, produces the light you want — no guesswork.
Time-of-day guide: what to do with natural light at every hour
Morning (7am–10am): directional and warm
This is the golden window — literally. Morning light from east-facing windows is warm, directional, and has a quality that's almost cinematic. If you're filming talking head UGC — a direct-to-camera testimonial, a review, anything face-forward — morning light makes faces look three-dimensional and alive.
Position yourself so the window is at roughly a 45-degree angle to your face, not directly in front of you. Direct front lighting flattens features. A 45-degree key light (even if it's a window) creates a shadow on one side of your face that adds dimension. Stay about 4–6 feet from the window: close enough to benefit from the diffusion, far enough that you're not fighting blown-out hotspots.
One problem: morning light changes fast. Between 7am and 9am the angle drops noticeably. If you're shooting a longer video or need multiple takes, batch them tightly. Don't start at 8am and expect to match footage you shot at 9:30am — the color temperature shift will be visible.
Midday (10am–2pm): the hard hours
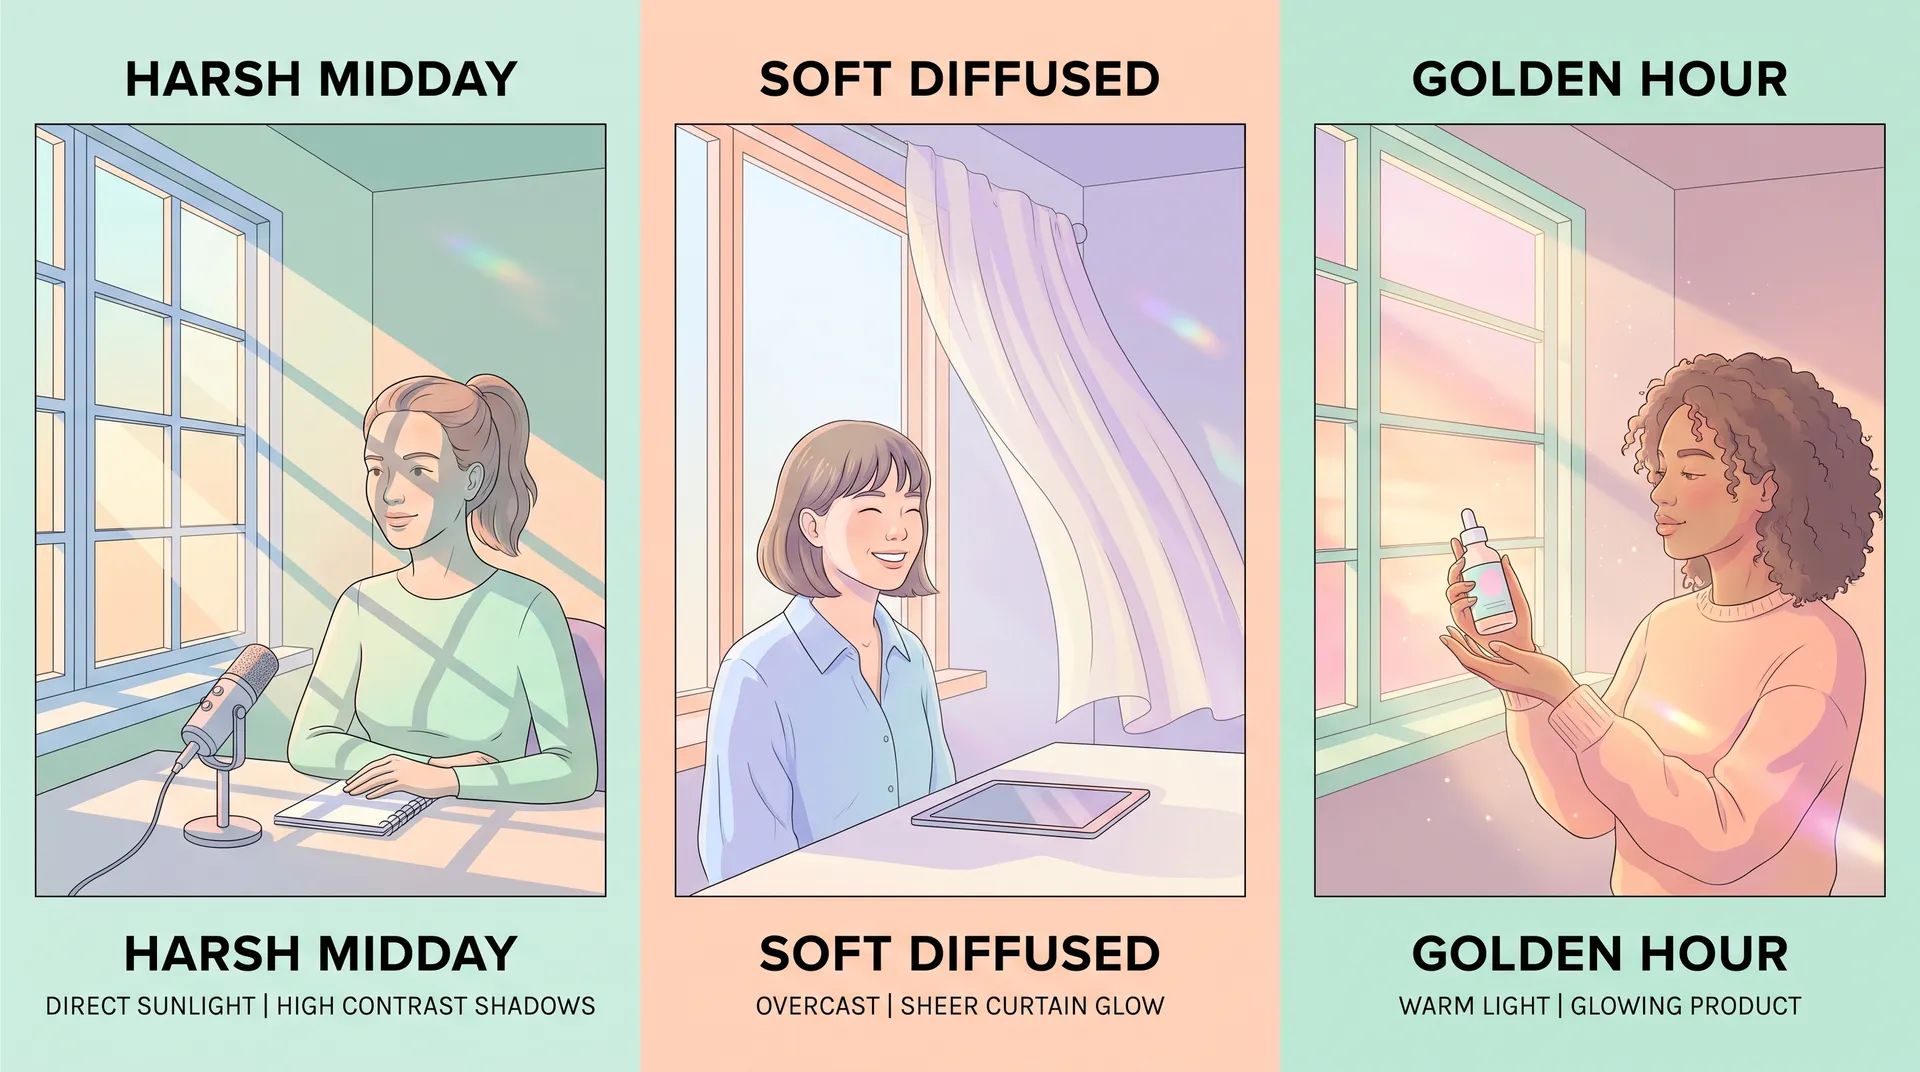
Don't fight it. Midday direct sunlight is harsh for a reason: the sun is directly overhead, casting downward shadows under eyes, noses, and chins that are unflattering and hard to fix in post.
If you have to shoot midday, here's what actually works:
Use a sheer curtain as a diffuser. A white sheer over a window turns a direct beam into a huge, soft light source. This is the move. I keep a simple IKEA sheer panel near my main filming window specifically for this.
Shoot in open shade outdoors. Stand on the shadowed side of a building, under an awning, or under a tree with full, open sky above you. You're getting indirect skylight from every direction — it's flat but even, and flat-but-even beats harsh shadows every time.
Use a white wall as a bounce. If direct light is blasting through a window onto one side of you, position yourself near a white wall opposite the window. The wall bounces that harsh light back and fills in the shadows.
Midday is also great for product close-ups and b-roll. Harsh shadows bother people's faces — they barely register on products. If you need to film a product demo or some b-roll of your product in action, midday on a slightly cloudy day is often perfect.
Afternoon (2pm–4pm): the sweet spot for indoors
This is underrated. Between 2pm and 4pm, the sun has dropped enough that even south-facing windows start producing beautiful, directional light without the midday harshness. The light is still warm but it's softer than morning — longer days in summer give you more of this window.
West-facing rooms really come alive here. If you have a home office or living room with western exposure, this is your prime time. Set up facing the window, give yourself that 45-degree angle, and you'll get footage that looks genuinely cinematic.
The color temperature in this window is also very close to tungsten/warm — which happens to be what most viewers associate with cozy, trustworthy, relatable content. That's not an accident. It's why late-afternoon lifestyle content consistently outperforms noon footage in brand recall.
Golden hour (1–2 hours before sunset): use it selectively
Everyone talks about golden hour like it solves everything. It doesn't — but when it works, nothing else competes.
The direct glow of golden hour is beautiful for outdoor product content, lifestyle shots, and before-and-after reveals (those need their own technique, covered here). But indoors it can be tricky: the light moves fast, it's extremely orange, and if your white balance is set to auto your phone will fight it the whole time.
Lock your white balance manually when shooting golden hour. On iPhone, use a third-party camera app like Halide or just shoot in ProRes/ProRAW and correct in post. On Android, most native camera apps have manual WB controls. Set it to around 3200–3500K and the footage will hold its warmth without clipping.
Use golden hour for texture shots — products on surfaces, hands interacting with packaging, anything where that warm directional glow adds richness. Don't rely on it for face-forward talking head content unless you can position yourself so the sun hits your face from the side, not straight on.
Overcast days: the underrated free softbox
A gray, overcast sky is a 10,000-square-foot softbox directly above you. Diffused through cloud cover, light wraps around everything evenly with essentially zero hard shadows.
This is genuinely the easiest light to work with. You don't need to think about angles, timing, or bouncing. Park yourself near a large window, face toward it, and shoot. The footage won't be warm or dramatic, but it'll be clean, professional, and consistent — which is exactly what brands want for product-forward content.
The one adjustment: overcast light tends to push blue. Warm your footage up slightly in post, or set your phone's white balance to "cloudy" to add warmth in camera.
Pro move: Overcast days are ideal for UGC unboxing videos where product color accuracy matters. You get even illumination across the product surface without specular highlights burning out packaging details.
Common natural light mistakes that kill your footage
Shooting with the window directly behind you. Your background gets lit, you become a silhouette. Always position the light source in front of or to the side of your face — never behind.
Mixing natural and artificial light. Your overhead LED ceiling light is daylight-balanced at 5000K. Natural window light shifts from 3200K (golden hour) to 6500K (overcast). Mix them and you get two different color temperatures fighting on screen, and faces look patchy and weird. Turn off all artificial lights when you're using window light. Every time.
Not checking what's in the background. Natural light reveals everything. That window you love also lights up your messy shelf, the power cables on your desk, and the shadow your curtain rod casts on the wall. Do a quick background check before every shoot.
Ignoring seasonal shift. In winter, the sun sits lower on the horizon all day — your morning and afternoon windows behave differently than in summer. The same window that gave you gorgeous light in July might be blasting direct sun into your face at the same time slot in December. Re-do your audit seasonally.
For everything beyond natural light — when you do need a ring light or LED panel and how to combine them — the UGC lighting on a budget guide covers exactly that. These two posts are meant to be read together.
Getting consistent looks across multiple shoot days
The biggest complaint I hear from brands: "the lighting looks different across your videos." That's a consistency problem, and it's fixable.
Keep a simple shoot log. Note the time, window, curtain position (open, half-closed, sheer on), and weather condition for every shoot. When footage looks great, you can replicate it. Shooting with just your phone makes this even more repeatable since you're not adjusting camera settings between shoots.
Consider using a freestanding photography reflector (a 5-in-1 runs about $25 on Amazon) to bounce fill light back onto your face on particularly bright days. White side fills light evenly, silver side adds a punch of brightness. That's the only "equipment" this approach needs.
Frequently Asked Questions
What is the best natural light setup for filming UGC videos?
What time of day is best for filming UGC content indoors with natural light?
How do I film UGC videos with natural light on a cloudy day?
How do I stop natural light from looking different across multiple UGC videos?
Can I use natural light for UGC product demos and b-roll?
Should I turn off artificial lights when filming with natural light?
Related reading
- How to film UGC content that converts (full guide)
- UGC lighting on a budget: natural light vs. ring light vs. LED panel
- How to film UGC content with just your phone
- How to shoot b-roll for UGC videos that sell
- Talking head UGC: on-camera delivery tips that build trust
- How to film a UGC unboxing video that feels real